So, we are to have butternut squash for dinner tonight. I started cooking squash for the first time last year, in all my 8 years of marriage, and it has become a favorite. I have been craving a squash soup, even though I have never tried squash soup, it just sounds soooooo good! I looked to see what a basic recipe would include as far as how to prepare the squash, and I found this great blog that teaches you how to cube butternut squash! One of those mysteries since I started cooking it. I always just washed the squash and then cut it in half, d-seeded it, and then placed each side into a 1/2 inch of water in a cookie sheet, and cooked it at 350 for 45 min. Worked great always, but then when I would scoop the squash out of the shriveled skins, I could never get it all out.
Cubing a butternut squash seemed hard enough, since it took all the force in my energy field just to cut through it once. Well, the Veggie Evangelist at this site:
http://kitchen-parade-veggieventure.blogspot.com/2009/11/how-to-cut-butternut-squash.html
helped me feel peace of mind that it didn't take wonder woman to be able to cube a butternut squash. You should check out her site and recipes, they are awesome, and I think I will be referring to them often. :)
Anyway, so I am going to be making butternut squash soup, my own style for dinner, Pictures will for sure be posted.
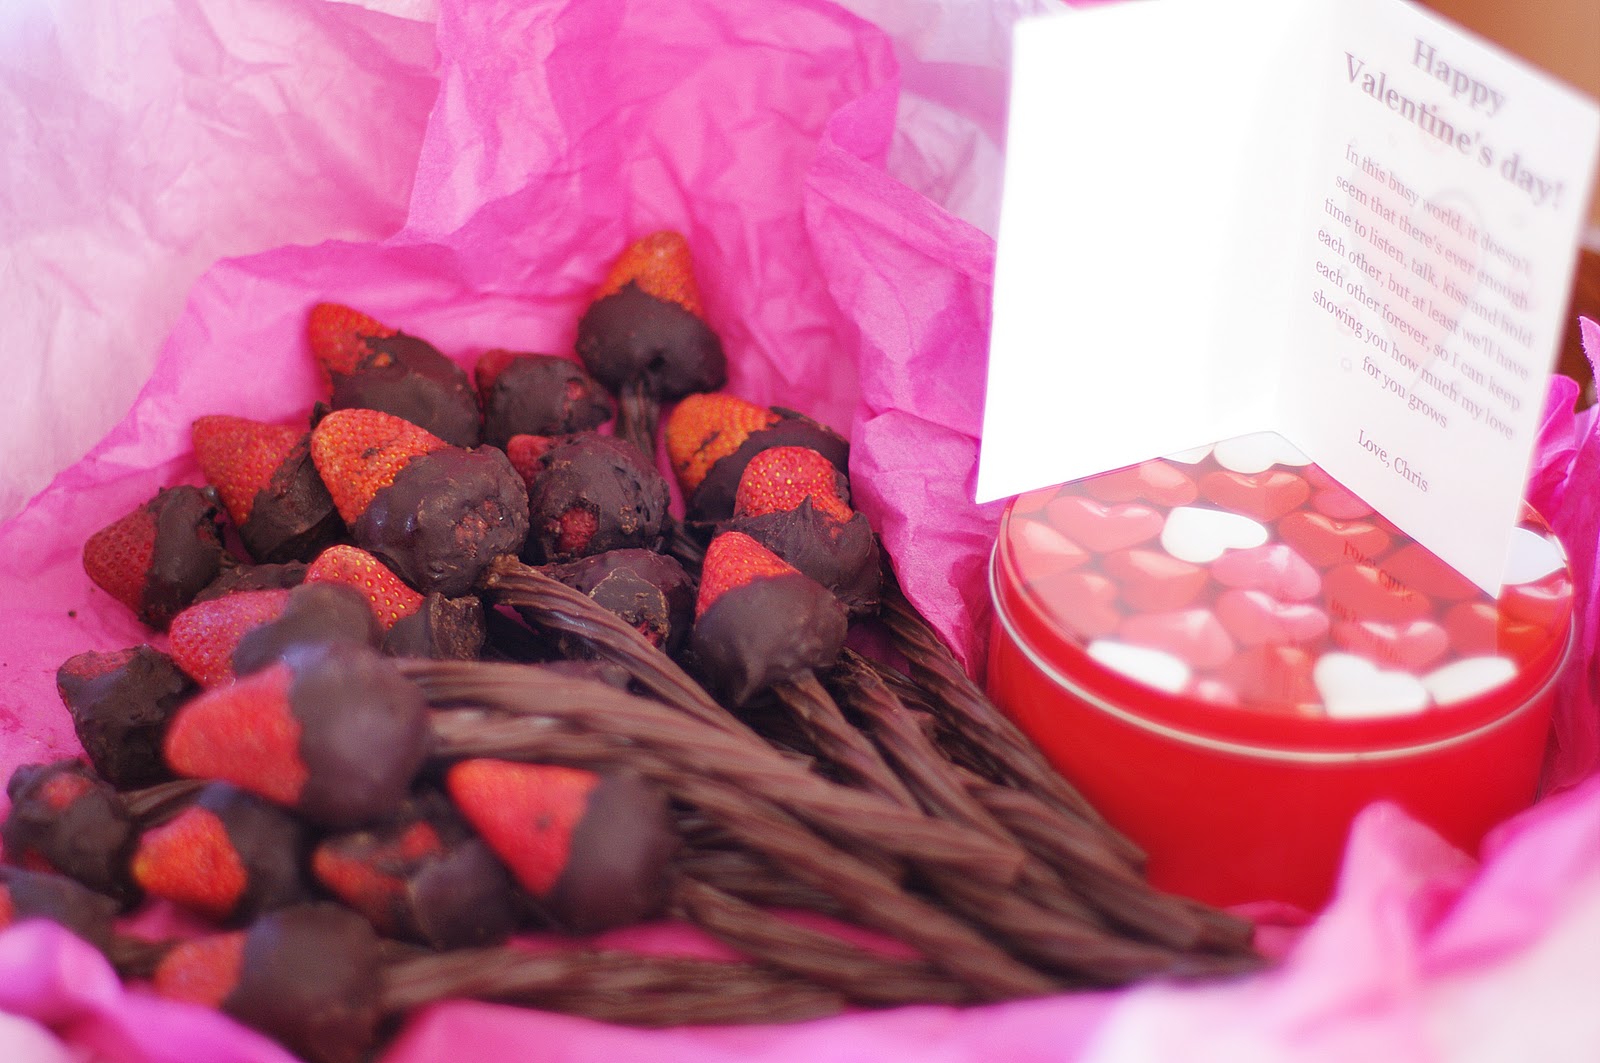
Now, the chocolate covered cherries. I came across a recipe for mint patties. I love myself a big York Peppermint Pattie, my favorite, especially after its been in the freezer for an hour or two. I plan on making them, but I thought I would throw a twist on them and add some maraschino cherrys to the mix : ) I might not be able to add the peppermint, I forgot to buy some extract, but I have almond and vanilla, that I think will make them just as delicious!
Now the question is, do I keep all those chocolate covered cherries and make myself fat, or find someone to share them with :)
Stay tuned for pictures and recipes :)
Thursday, February 24, 2011
Wednesday, February 23, 2011
Chili crackers made with Quinoa

 |
| My taste testers modeled their snacks for me :) |
So I decided to try the crackers with the Quinoa flower. Success! My husband loved them so much, he made me take home a handful for himself from my parents house. The next day, he kept commenting on how they tasted like cheezits without the cheese and other chemicals you would find in the store bought ones. Best of all, my cute little nephew who is allergic to wheat could have them. They are just Qiunoa flower, almonds blended with olive oil, and a few spices and salt.
Again, the best way to go about these is to sprout the almonds and Quinoa first to get the ultimate nutritional value out of them :)
So cool! I just thought I would update on that :)
Sunday, February 20, 2011
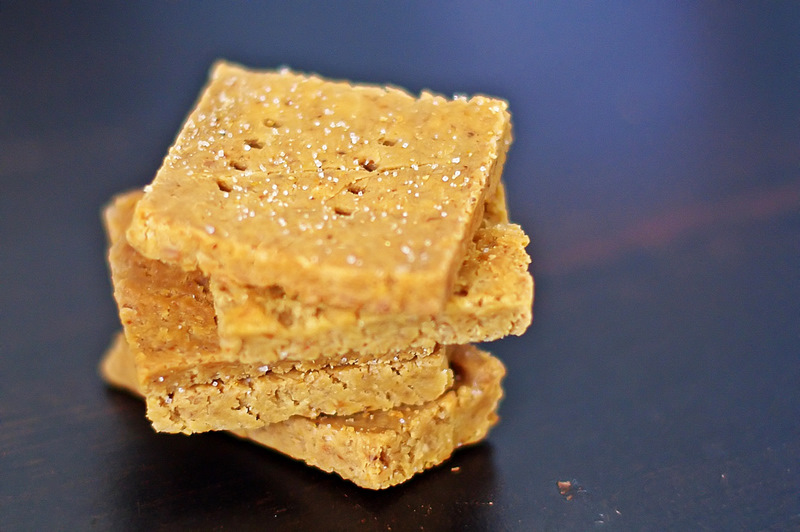
Apple crumbly shortbread yum
I was craving shortbread. I had one stick of butter, and a can of apple pie filling. I know I need to make my own filling, but I couldn't waste the can in the pantry.
I thought about making an apple pie, but butter is so much better for you than crisco/shortening, so I decided to make make shortbread and put the apple stuff with it. Then I decided it would be yummy to make it crumbly :)
Shortbread:
1 1/4 cups of flour
1/2 cup butter
3 tbs of sugar
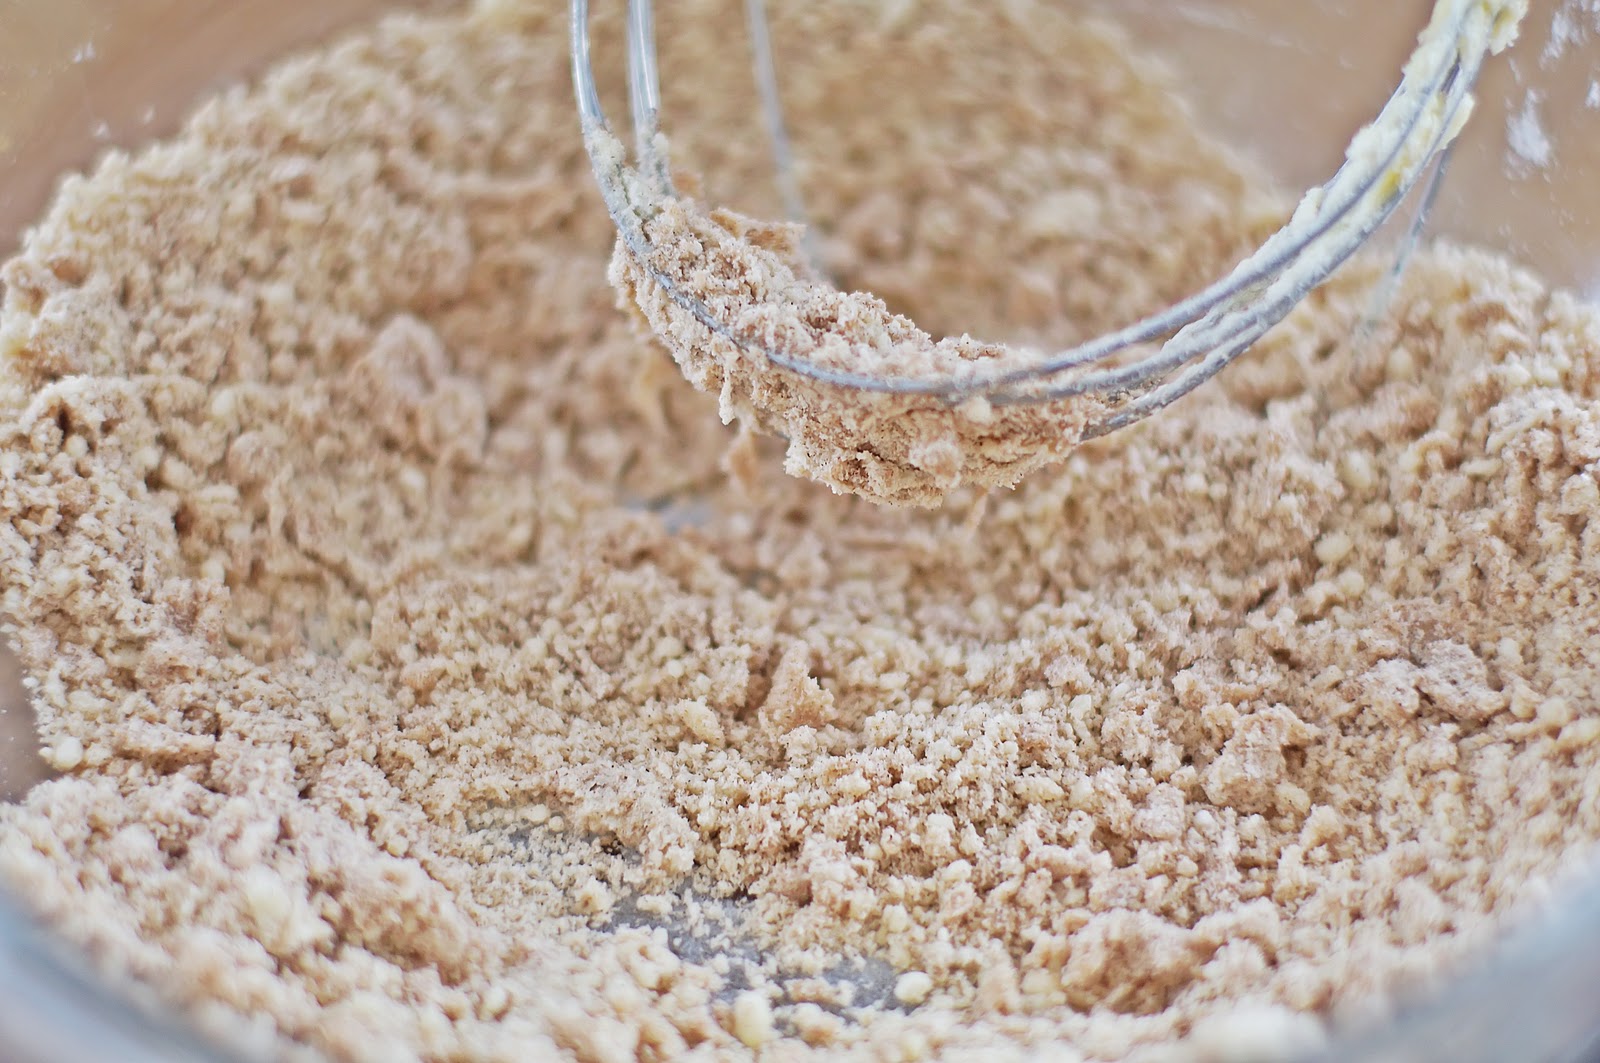
Mix the flour and the sugar together, then soften the butter just enough to cut through it easily. (Don't do what I did and melt it for 30 seconds in the microwave........it melted........all over.) Cut the butter into the flour and sugar with a pie thingy(sorry I forgot what it was called), like in my picture below, or a fork. Do not pack it together at all, make it as crumbly as possible, and mix the butter into all of it evenly. It should be slightly moist from the butter, mine wasn't because I lost a lot of butter in the microwave, so mine was slightly dry. But it still turned out good. Just remember if you get to much butter though, the crust wont stay together as well, and the same for to little butter.
I thought about making an apple pie, but butter is so much better for you than crisco/shortening, so I decided to make make shortbread and put the apple stuff with it. Then I decided it would be yummy to make it crumbly :)
Shortbread:
1 1/4 cups of flour
1/2 cup butter
3 tbs of sugar
Mix the flour and the sugar together, then soften the butter just enough to cut through it easily. (Don't do what I did and melt it for 30 seconds in the microwave........it melted........all over.) Cut the butter into the flour and sugar with a pie thingy(sorry I forgot what it was called), like in my picture below, or a fork. Do not pack it together at all, make it as crumbly as possible, and mix the butter into all of it evenly. It should be slightly moist from the butter, mine wasn't because I lost a lot of butter in the microwave, so mine was slightly dry. But it still turned out good. Just remember if you get to much butter though, the crust wont stay together as well, and the same for to little butter.
 |
| take a 9 inch pan, and put a little more than half of the mix into the bottom, spread evenly and press slightly, so the crust will still be crumbly, but together, or if you like a more firm crust you can press it more. |
 |
| Now add the pie filling, I actually wish I had more filling, the idea is to get the gooey part to kind of saturate the crust part. I sprinkled a tiny bit of water onto the syrupy part to help. |
 |
| Now with the remaining crust crumbs, add 1/2 cup of sugar, some cinnimon and nutmeg if you want, and if its not real moist add a little bit more butter, mix it well, keeping the flour as crumbs |
 |
| then sprinkle on top of the pie filling |
 |
| so it looks like this...... |
 |
| taste tester #1 approves |
 |
| taste tester #2, takes this stuff seriously |
 |
| sprinkle a little sugar and cinnimon on top |
 |
| Bake for 35 min. at 400*F |
 | |||||||||||||
| Then cool for 5 minutes, and serve! So Simple! So yummy! Next time I want to try Cherry, its my favorite. The only thing I wish I could have added to it is carmel sauce to drizzle on the bottom crust before adding the filling, and then a little on top too. :) I will post my invented carmel sauce with some carmel corn soon :) Its one of our favorite treats! |
Wednesday, February 16, 2011
Rice and Almond, Chili crackers invented recipe
 | |
| I started out with a 16 oz bag of wild rice. I have never tried making rice flour in my kitchen champ before, so I didn't know if it would work or not, but it did! Blend your rice to a powder. Mine was still a little bit grainy, but that's actually good. It makes the crackers more crunchy. I added chili powder, paprika, salt, and garlic powder, and Thyme and mixed it with the flour well. I tasted the flower to make sure the flavor was good. |
 | |||
| I forgot to get a picture of making the almond paste, but I just put a cup of almond, and a around a cup of water in my blender, and then started to blend it, when it started to get thick, I started to add olive oil, about 3/4 cup worth. Blended it until smooth creamy texture was acheived. |
 |
| after I mixed the rice flour and the almond paste, I kneaded it a little more with my hands to make sure all ingredients were mixed well. The oil in the almond paste helps the crackers cook. |
 |
| taste tester #1................she approved |
 |
| taste tester #2..............despite the look on her face, she approved too, and they both came back for seconds :) |
 |
| I rolled it out onto a cook sheet |
 |
| I wanted circles, so I used a lid from my Thyme spice container.......... |
 |
| I made some squares too, for fun........ |
 | ||||
| then I tossed them into the oven, and cooked them for 43 minutes at 325* F. |
 | ||||||||||||||
| The verdict? Well, the flavor is delicious, the cracker is a tiny bit dry and reminds me of Chicken feed, but I can't stop eating them, so I guess that's a good thing. I am going to try again tomorrow actually. The almonds are much better, and more healthy for you when you soak them overnight. I am going to soak my rice too, so its not so hard. I also want to try this recipe with finely ground rice flour, with no big grains to avoid the chicken feed texture. hehe Definitely a recipe to try, but there are a few tweaks that need to be taken care of :) I will post when its perfected! As far as these particular crackers, I am going to use them for salad garnishments, and for when I get snacky :) |
Monday, February 14, 2011
My husband is crafty.......and so very sweet!
 | |
| So in my last post I mentioned how my husband always outdoes me when it comes to gifts. And its not because we are trying to have a contest or anything, he just naturally has sweet thoughts and ideas, and I am always just in awe with what he does for me for valentines day. I am pretty sure he gets that trait from his sweet mommy, but nonetheless he makes me feel like gold. I love him so much! I wanted to share a little bit about the card he wrote me too..... |
Dear husband you are so sweet and thoughtful, and that is what I love about you the most!
Here are some other things my heart has been tenderized with :)
Your soft sweet eyes, and face. They melt me
your ability to make me feel loved everyday, even when days are rough
Your love for our little girls
I love the way you laugh, especially at t.v. shows or commercials. You can find the humor in all things and it makes everyone else around you happy too.
You have a natural ability to make friends, and people think you are adorable(so do I)
I love that you support me in my thoughts and ideas and you let me treat you and our family with herbs and essential oils instead of modern medicine, and you inspire me to keep going with the healthy way of life. :)
You let me be the mom I want to be
I love that you have taken on two jobs to support us, I know its not easy, but you keep pluggin a long and you are on top of your responsibilities. It encourages me to try harder too.
I love that you take care of your body, and you have one of a kind blood pressure:) and health from jogging your whole life:) You appreciate your body, and it appreciates you.
I love that you take the kids on jogs and encourage them.
I love that you went and bought Adria a soccor ball and cones, to practice with her before her first game, and that you want to be to everything that the kids do.
I love that you participate in the kids nightly routine every night, and that you have read to the girls every night since our oldest was born, I know our kids will be forever close to you because of that. It comes natural to you to be cute with them, and you are soooooooo cute with them. :)
I love that you have a personal calendar that you check every morning, and you follow through with your plans for the day. I love your lists and your schedules. :)
I love that I can ask anything of you and you are right there with me to figure it all out.
I love that you encouraged hypnobabies and a natural delivery with our little baby. I couldn't have asked for a more supportive husband during that time, and you still are.
I love that the gospel is important to you, and that you do what you are asked to do without complaining, I know heavenly father knows that about you, and trusts you with each calling he gives you. I think your new calling is absolutely perfect, and that the cub scouts will benefit so much with you being their friend.
I love that everything that is important in life is your passion, it shows and we all know who you are because of it.
I could go on and on, and I love that too :)
My love, my best friend, my companion, You are Amazing :)
Happy Valentines Day! I am super excited for our date tonight!!!
Love you!
Your wife :)
Sunday, February 13, 2011
Happy Valentines made from scratch gift
o.k., so I bought the materials a few days ago, but this was made from the basics so I think it counts to fit on this blog...........
I decided to make my husband something this year. He always outdoes me when it comes to gifts, and its not because he tries to......., he is just naturally good at it. Stinker.....
So I went to Micheal's and browsed. At first I was going to get him a statue of a dragon that he had ooohed and awwwwed over a couple days before when we went to Micheal's together, but then I decided to try my hand at making something up for him.
I bought a canvas wrap, and 3 wooden hearts. I also had just ordered some prints of my girls birthday pictures. I got some clear varnish, and some foam paint brushes.
He likes to have pictures of us at his desk at work, so I thought it would be fun to make him something new.
This is what I came up with :)
 |
| Adria and Lindsey need to sign it too |
 | ||
| little bit of stamp ink and paper ribbon |
 | ||||||||
| Oh, and look at my new awesome Zebra striped plates that I got for my birthday! I can't wait to display my final recipe results on them!!! :) The End |
Friday, February 11, 2011
Steamed spinach (not the way you think)and rice Dinner
My kids like it, and that's a good thing.
Recipe:
1 cup of rice for 2 cups of water (for a family of 4 people with teeth, sorry baby you will have to grow some more teeth first) :)
a small pile of fresh spinach on each family members plate.Not layered to thickly
1 cube of organic vegetable bullion
1 tbs of olive oil
1 small chopped onion
1 chopped green pepper
butter
salt
pepper
cashews
pineapple
if you like meat, you can add some cooked turkey or chicken
shoyu or soy sauce if you would like
Bring your water to a boil, then add oil, rice, onions, and green pepper, and bullion,
reduce heat to low and cover with a lid. Let rice cook until tender
While you are waiting for the rice to cook, serve some fresh fruit to your family. :) (This is a key ingredient to a nice family dinner) :)
When rice is done, serve it on top of the spinach before it cools. The heat will steam the spinach.
Add all other ingredients on top of the rice and enjoy!
Simple, healthy, filling and yummy!
Add to the scones
I made scones again yesterday..........this may become a problem.........
Plus I will be making them again on Monday, hmmmmmmmmm, sounds great.
Anyway, I did it again, I thought of a way to make these scones even more tasteful than my palette already thinks they are. And my husband contributed to the mess also.
Pizza, one of my downfalls. I like to make Pizza.
you will need the following:
Your scone dough rolled out
1 tbs of pizza sauce per pizza pocket
a cup of shredded mozzerella
pepperoni if you would like
sliced jalapenos
olives of your choice
whatever else you like on a pizza
or apple pie filling (my husbands idea, shame on him)
here is a link to a great apple pie filling http://www.myhomecooking.net/apple-pie/apple-pie-filling.htm
I would make up my own, but I haven't tried it yet, so I don't want to lead you astray. :)
slice dough with a knife or pizza cutter into rectangles about 3x6 or however wide you want your pizza pocket.
layer ingredients like a pizza on half of the rectangle, and sauce on all of the rectangle. Make sure you leave1/4 of an inch of edge to pinch the dough closed.
Or if you are making apple pie goodness, layer your filling on one half.
Fold over the top half of the rectangle with only the sauce on it, and pinch the edges closed.
Now fry like a scone, and be careful to not get holes in the crust while frying to make sure filling doesn't come out into the oil.
You can also, slather the outside of the uncooked pizza pocket with olive oil, and cook it in the oven at 400, for about 12 minutes, and watch carefully so they wont burn.
There ya go, easy pizza. Or Apple goodness
You can top the apple goodness with a glaze or butter.
Just don't eat them to often, because this recipe does not belong on a weight watchers website...............hehe
Pictures soon to come..........(which means I might be making some for dinner tonight)
Wednesday, February 9, 2011
Valentine Scones
I made these the other day and plan on making them again for Valentines day coming up.
2 1/2 to 3 cups of bread flour
1 tsp stevia or 2 tsp sugar
1 tbs baking powder
1 tsp salt
1 1/3 cups water or milk. (I like water, I never cook with dairy milk)
olive oil to fry in
Combine dry ingredients and mix well, then slowly mix in water. When dough is to much to stir, start to knead it until it is all mixed well, add more flour if it is to sticky, but don't let it get to dry. Let it sit for 30 minutes.
After 30 minutes, roll dough out to 1/4 inch or less, the thinner the better before it gets holes in it. :)
Prepare your frying pan with oil at medium high heat
Now cut with a heart shaped cookie cutter, and place heart dough in oil. Turn when the bottom side starts to get golden brown, then remove from oil when both sides are golden and puffed up.
 After you take it out while its still hot you can lay it in a bowl of sugar and cinnamon and coat each side, or decorate it with frosting when it cools, or just eat it with honey, or salsa, or any scone toppings. :)
Yum.
2 1/2 to 3 cups of bread flour
1 tsp stevia or 2 tsp sugar
1 tbs baking powder
1 tsp salt
1 1/3 cups water or milk. (I like water, I never cook with dairy milk)
olive oil to fry in
Combine dry ingredients and mix well, then slowly mix in water. When dough is to much to stir, start to knead it until it is all mixed well, add more flour if it is to sticky, but don't let it get to dry. Let it sit for 30 minutes.
After 30 minutes, roll dough out to 1/4 inch or less, the thinner the better before it gets holes in it. :)
Prepare your frying pan with oil at medium high heat
Now cut with a heart shaped cookie cutter, and place heart dough in oil. Turn when the bottom side starts to get golden brown, then remove from oil when both sides are golden and puffed up.

Yum.
Salad Sandwich
We love salads around here, we have one for Lunch and Dinner, usually everyday.
We recently participated in the local food co-op, Bountiful Baskets, and we received a ton of delicious produce for a great price! One thing we were so abundantly given were Avacados. Yum.
We love Avacados for a few different reasons.
1st. Who (besides my unusual, but wonderful husband) can really get enough of that buttery creamy flavor?
2nd. They are full of the "Good" fats that we are supposed to be getting 3 tbs. of each day.
3rd. They are specifically good for the reproductive system and they support the brain tissue with their healthy fats. (women you should be eating these everyday)
4th, ...............really who can get enough of the buttery creamy flavor?
+ they are a tropical fruit, so I am thinking they get lots of vitamin D, so they are a good source for that too!
mmmmmmmm
So today, I wanted a sandwich. I usually don't have Jelly sandwiches, but for Christmas my sweet cousin gave us some homemade grape jelly, so I wanted to give the kids Jelly sandwiches for lunch. I however wanted a little more than Jelly on my sandwich, so for me instead, I came up with the idea of a Salad Sandwich!
We don't use mayonnaise here at the house either, but we have some ranch dressing, so I layed out two pieces of 9 grain bread (also from the food co-op, I got 5 loaves for $10, so another reason for wanting to use bread for lunch), and I put a little ranch on them. Then I loaded it with lettuce and salad ingredients, paprika, pickles, avacado, and a tomato. It was heavenly! In fact my husband had said he didn't want one at first, but then when he saw mine, he decided he would have one too:)
Recipe:
Two pieces of bread
ranch or honey mustard dressing
sliced green olives
sliced avacado
sliced pickles
sliced tomatoe
sprinkle of paprika
sprinkle of salt
sprinkle of pepper
Recipe for honey mustard dressing:
equal parts
honey
mustard
olive oil
add more oil to make runnier
I should have taken a picture of my sandwich, but I plan on making it again soon, so I will post one soon!
Headbands made from Scratch
 | |
| I wanted something original and new for my girls, so I came up with these headbands. They are pretty simple, a little time consuming, but they are super cute on their heads, and fun and worth it. I am just getting their idea started, but I think there will be a few different ways of doing them to get a bigger variety of the idea. :) I like variety........ |
 |
| The funnest part about them, is you can custom make them to your kids outfits :) |
 | |||
| And they are thin enough you can wear them on the top or bottom of your hair. The wire in them also makes them so they are very light, and they wont make indents on your poor kids heads, and they don't create headaches :) |
Subscribe to:
Posts (Atom)